A kitchen island works when it fits the room, suits the workflow, and is built to last. Most islands fail at least one of them, and the reason is almost always the same: the design was chosen before the kitchen was properly understood.
Below you’ll find 20 ideas drawn from over 44 years of designing and building kitchens from our workshop in Santry, the mistakes that cost people money, and what you should realistically expect to pay. If you’ve been looking at inspiration images and wondering why none of them quite match your kitchen, that gap is exactly what this is here to close.
How Much Space Do You Actually Need for a Kitchen Island?
This is the part most guides skip: some kitchens simply aren’t suitable for an island, and no amount of design creativity changes the physics of floor space.
The standard rule is 1,000mm of clear walkway on each side of an island. In a narrow galley kitchen or a compact room under 12m², that clearance disappears the moment you put anything significant in the middle. The result isn’t a functional island. It’s an obstacle.
“Too small for an island” doesn’t mean too small for island-style functionality. A peninsula fixed to one wall gives you the same prep space and the same seating overhang, without needing clearance on all sides. In L-shaped kitchens across North Dublin, we fit peninsulas regularly for exactly this reason. In a small kitchen with genuine space constraints, a peninsula is often the smarter call than forcing a freestanding island into a room that doesn’t have room for it.
One question that comes up regularly: does a kitchen island need planning permission? The island itself doesn’t. It’s internal furniture. If you’re extending the kitchen to create space for one, whether that requires permission depends on the size of the extension. Citizens Information has the current planning permission rules for altering your house, including the 40m² exemption threshold most Dublin homeowners fall within.
Standard Kitchen Island Dimensions: Length, Depth and Height
Irish housing stock is largely semi-detached and terraced. Kitchen extensions are common, but the rooms they produce are often rectangular, with natural light at one end and cabinetry at the other. That context matters for island sizing.
A standard island runs 1,200mm to 2,400mm long and 600mm to 900mm deep. For most Irish kitchens following a rear extension, 1,500mm to 1,800mm long and 700mm deep hits the sweet spot. It gives you a proper worktop surface and deep enough drawers for storage, without consuming the room.
Height depends on how you use the island. Standard worktop height is 900mm, which matches your kitchen cabinetry and keeps food prep comfortable. If you want seating on one side, a raised overhang at 1,050mm to 1,100mm with bar stools works well. Some islands use a split-level design with prep height on one side and dining height on the other. That works in larger open plan kitchens where the island is doing two distinct jobs.
The minimum room width for a 1,500mm island with proper clearance on all sides is around 3,200mm. If you’re adding seating on one side, 3,500mm is a safer target: the stool overhang and the aisle behind it both need room to function. Measure your space before you go any further. If you’re still in the early stages of planning, our kitchen planning guide covers the full design process from layout to installation.
20 Kitchen Island Ideas That Work in Irish Homes
1. The prep island with deep drawers
The most functional kitchen island for everyday cooking is often the least dramatic: a solid worktop surface with three or four deep drawers below. No sink, no hob, no appliances. Just space to work and somewhere to store your pots, utensils, and baking equipment properly. Drawer internal depth of 450mm to 550mm is what you need to actually fit pans, mixing bowls, and a stand mixer without forcing anything. This is the island we’d recommend to most households if they asked us directly. Everyone wants the waterfall worktop. Fewer people ask for the thing that changes how they cook every single day.
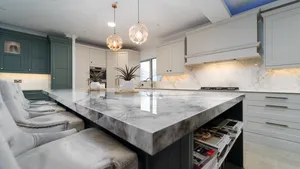
2. Waterfall worktop
A worktop that wraps over the edge and continues down to the floor on one or both sides. It reads as one continuous surface rather than a box with a lid on top. Quartz and solid stone work best here. The visual weight is significant, so it suits kitchens where the island is a deliberate focal point rather than a practical afterthought.
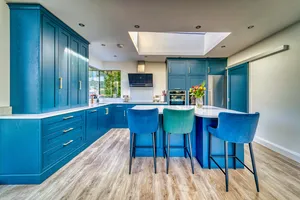
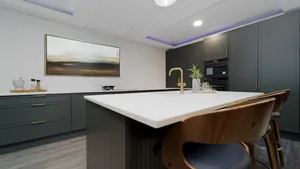
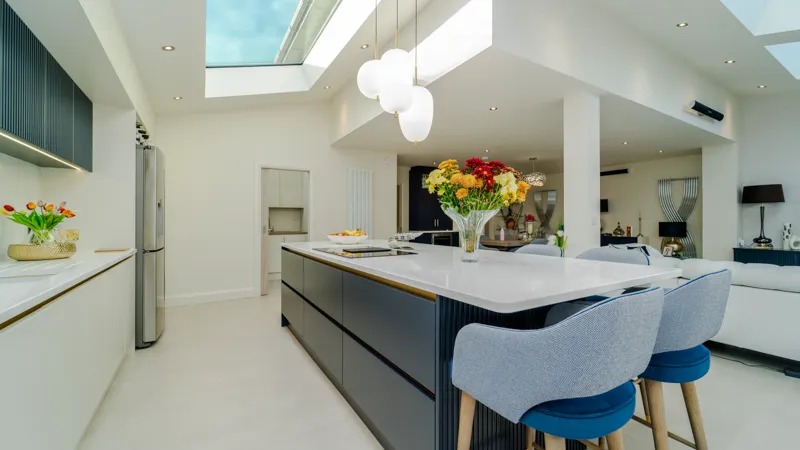
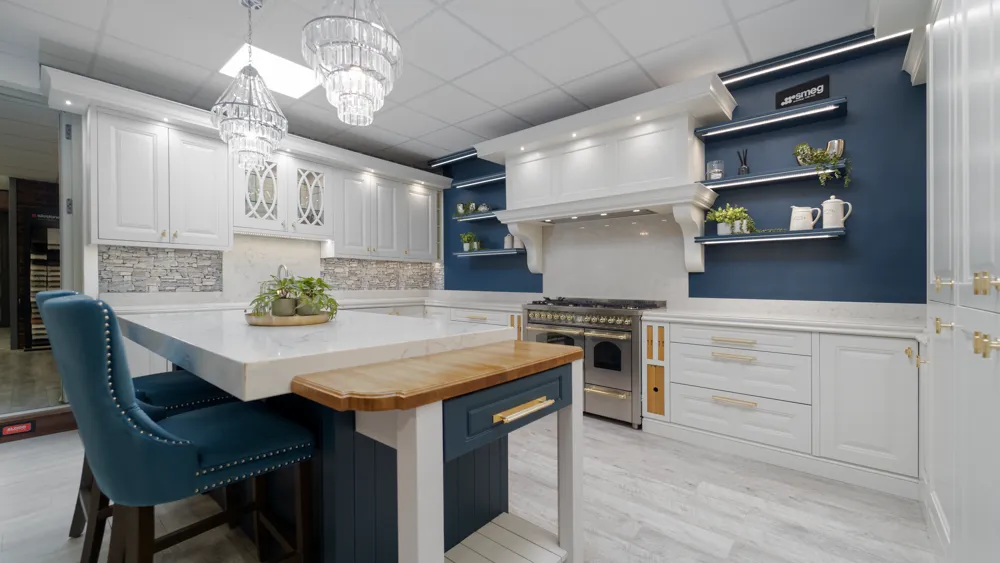
3. Two-tone cabinetry
One of the most consistently popular kitchen design decisions we see is a contrasting island. Wall and base cabinetry in one colour, island in something different. Navy island against cream cabinetry. A warm oak island against a painted wall unit. The island becomes a focal point and gives a beautiful kitchen structure, stopping everything blurring together.
4. Open shelving on the island end
Rather than solid cabinet panels on the ends of the island, open shelves give you accessible storage and visual lightness. Cookbooks, a few bottles, a bowl of fruit. The shelf depth matters: 250mm to 300mm works. Anything shallower looks unintentional. The catch is that open shelves need to be kept curated. In a showroom they look considered. In most kitchens, within a week, they collect things that should be in drawers.
5. Island with a breakfast bar overhang
Extending the worktop to create a breakfast bar on one side is one of the most practical kitchen island ideas for families. You get seating without adding a separate dining table. A 300mm to 400mm overhang is enough for a stool and a plate. For comfortable knee clearance, 250mm minimum underneath.
6. The hob island
Moving the hob to the island faces it towards the room rather than a wall. It changes how cooking feels, particularly in an open plan kitchen where you’re cooking and talking at the same time. The practical requirement is extraction: either a ceiling-mounted hood above the island or, increasingly, a built-in induction hob with integrated downdraft extraction. Bora hobs do this well and remove the need for overhead extraction entirely.
7. Built-in sink on the island
A sink on the island makes sense when it faces a living or dining area and the cook wants to be part of the room rather than standing with their back to it. Good for families. Good for anyone who cooks regularly and wants to be in the conversation rather than facing a wall. It requires plumbing to the island, which adds cost and complexity, and drainage planning during installation. Not something you retrofit. Decide at the design stage or don’t do it.
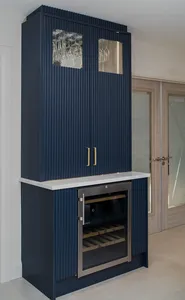
8. Wine storage and glassware drawers
Dedicated wine storage built into the island base, with shallow drawers above for glassware, suits kitchens that regularly host people. It keeps drinks and glasses off the worktop and away from the main kitchen storage. For kitchen design coherence, it works best when the island is doing an entertaining role rather than a pure prep role.
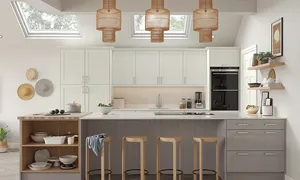
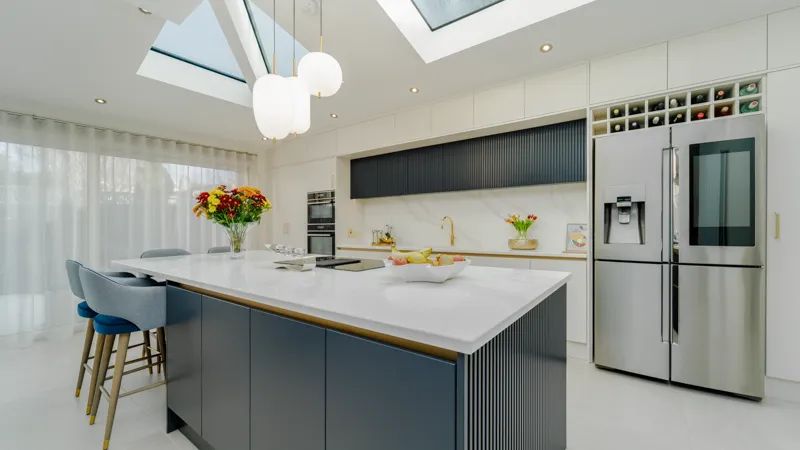
9. Pendant lights above the island
Pendant light positioning transforms how an island reads in the room. Two or three pendants centred over the island, hung at roughly 700mm to 800mm above the worktop surface, define the island as a distinct zone within the kitchen. The scale of the pendant matters: small pendants over a large island look hesitant. A large single statement pendant, or three pendants with real visual presence, anchors the space. Most people spend properly on the island itself and then fit cheap pendants as an afterthought. It shows.
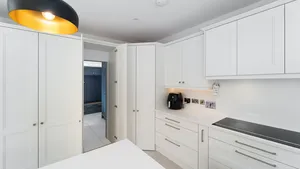
10. The slimline island for narrow kitchens
If your kitchen can’t accommodate a standard 700mm deep island without compromising circulation, a 450mm to 550mm deep slimline island is worth considering. You lose some drawer depth, but you gain worktop space without sacrificing flow. In South Dublin terraces and period homes in Drumcondra and Ranelagh, slimline islands appear regularly in our projects for exactly this reason.
11. Integrated appliance tower at the island end
A tall cabinet unit built onto one end of the island, housing an oven, microwave, and warming drawer in a vertical stack. It creates a distinct cooking zone and frees up wall space. In larger open plan kitchens, this works well as a visual anchor that gives the island a sense of weight and purpose at one end rather than leaving it as a flat run of worktop in the middle of the room.
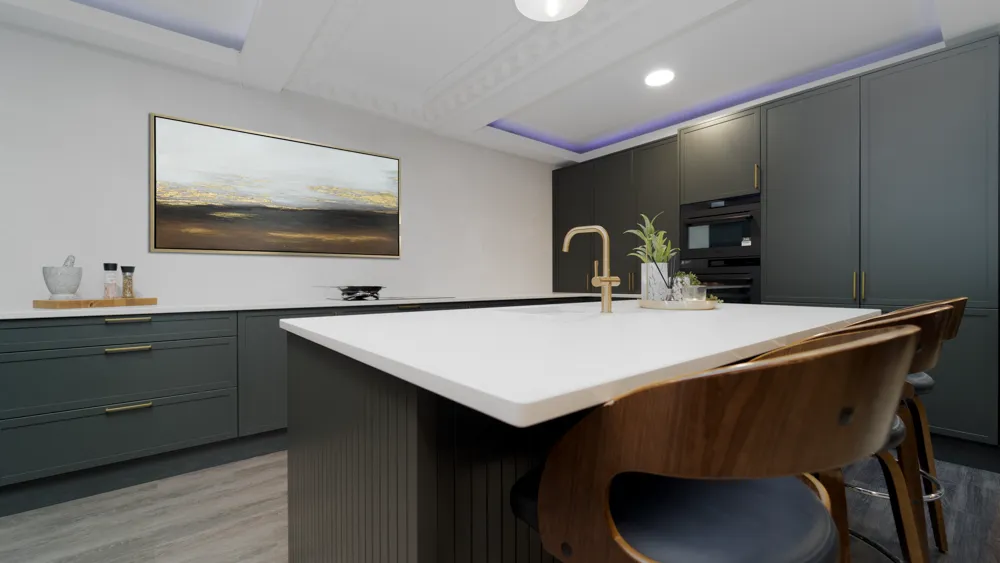
12. The Shaker island in a modern kitchen
A shaker-style island in a clean, neutral kitchen brings warmth and craft without pulling the room backwards into something purely traditional. The frame-and-panel door works in painted cabinetry, particularly in deeper tones: forest green, navy, a warm charcoal. Paired with a natural stone worktop and unlacquered brass hardware, this is one of the most enduring kitchen island combinations we build.
13. Pop-up power sockets
Recessed into the island worktop, pop-up sockets rise when you need them and sit flush when you don’t. Useful for appliances on the worktop: a stand mixer, a coffee machine, a phone. In our experience, this is the detail clients mention most often when they call us after the kitchen is in. Not the worktop. Not the cabinetry colour. The sockets they nearly didn’t add.
14. Toe-kick drawers
The space beneath the base cabinets, normally a dead zone, can be converted into shallow drawers for flat items: baking trays, chopping boards, cooling racks. These are particularly useful in kitchens where deep drawer storage elsewhere is limited. They require custom fitting and add to the cost of the island, but in a small kitchen where storage is a genuine problem, they’re worth the investment.
15. Fluted or reeded cabinet fronts on the island
A textured finish on the island cabinetry, while the rest of the kitchen remains plain, creates visual contrast without introducing a different colour. Reeded oak or fluted painted panels read as considered detailing. This is the kind of feature that photographs well but also genuinely looks good in person, which is not always the same thing.
16. A contrasting stone worktop
If your kitchen countertops are quartz, an island in a different stone or with a different finish adds definition. A honed marble island worktop against a polished quartz perimeter. A dark quartzite island against lighter wall units. The contrast gives the island its own identity rather than making everything match in a way that feels slightly flat.
17. The mobile island for flexible layouts
For kitchens where flexibility genuinely matters, a well-built mobile island with solid castors and a hardwood top gives you the option to move it. This suits open plan living spaces where the island sometimes needs to shift position, or homes with children where the layout changes over time. The quality of the castors and the frame matters. A cheap mobile island wobbles and deteriorates within a couple of years. Spend properly on it or don’t bother.
18. Seating on three sides
Most islands are designed with seating on one side only. In a kitchen with generous floor space, seating on two or three sides turns the island into a dining table rather than just a breakfast bar. This works particularly well in open plan kitchens where the island is doing the work of both a prep surface and an informal dining spot, and a formal dining table sits elsewhere in the room.
19. The island as room divider
In a kitchen that opens directly into a living or dining area, the island defines the boundary between spaces without closing the room off. The island becomes architecture as much as furniture. For this to read as deliberate rather than accidental, the island needs to be long enough to hold the visual division: typically 1,800mm or above. Anything shorter and it looks like it wandered into the room.
20. Storage optimised entirely for the cook’s workflow
The most overlooked kitchen island idea is the simplest: designing the storage around what you actually use rather than what looks good in a brochure. If you bake regularly, the island drawers should be deep enough for mixing bowls and stand mixers. If you prep vegetables every evening, the chopping area should be positioned in the right place relative to the sink. These decisions get made at the design stage and they’re very difficult to change afterwards.
Kitchen Island Ideas for Small Kitchens
A small kitchen doesn’t rule out an island. It rules out a badly planned one.
The threshold most designers use is 12m². Below that, a freestanding island with clearance on all sides typically eats too much floor space to be worth it. But there are three approaches that work well in compact Irish kitchens and deliver the same functional gains.
The slimline island. At 450mm to 550mm deep instead of the standard 700mm, a slimline island keeps clearance intact while adding a proper worktop surface and drawer storage. In terraced houses and period homes across Drumcondra, Ranelagh and Rathgar, this is the version we fit most often. It won’t take a Bora hob or an undermount sink, but it handles food prep, morning coffee, and storage without the room feeling crowded.
The peninsula. Fixed to one wall rather than freestanding, a peninsula needs clearance on three sides rather than four. In L-shaped kitchens this is often the better call. You get the same worktop overhang for breakfast bar seating and the same deep drawer storage, but the footprint is significantly smaller and the layout is cleaner.
Toe-kick drawers. In a genuinely small kitchen where any island feels like too much, converting the dead space beneath existing base cabinets into shallow toe-kick drawers recovers useful storage for baking trays, chopping boards and cooling racks without adding a single centimetre to the floor plan.
The question to ask before committing to any of these is the same one that matters for a larger kitchen: what is this island for? If the answer is prep space and storage, a slimline island or peninsula solves it. If the answer is seating, a peninsula with an overhang does it more efficiently than a freestanding island in a room that’s fighting for every metre.
What to Avoid When Planning a Kitchen Island
An island that’s too big for the room. The single most common issue. An island that eats floor space and forces awkward routes around it doesn’t function as a kitchen island. It functions as an obstacle with a worktop on top.
Moving the sink to the island without planning the extraction and plumbing routes. Both are solvable, but both need to be planned at the design stage. An island sink requires plumbing runs to the middle of the room and drainage that can’t be added as an afterthought.
Open shelving without a plan for keeping it tidy. Open shelves on an island look considered in a showroom and cluttered within a week in most households. If you want open shelving, plan what goes on it and commit to keeping it curated. If you’re not that person, closed cabinetry serves you better.
Choosing an island worktop material for appearance and ignoring practicality. Marble marks. Natural stone requires sealing. A beautiful kitchen isn’t much use if the worktop surface you’ve chosen doesn’t suit how you cook. Ask about maintenance requirements before committing to a material.
Fitting an island into a kitchen that doesn’t have adequate lighting above it. An island without proper light above it is dim, uninviting, and hard to work at. Pendant lights are not expensive relative to the cost of the island itself, and they make a significant difference to how the island reads and how comfortable it is to use.
Bespoke vs Prefab: What You’re Actually Paying For
A prefabricated island from IKEA or a home improvement retailer runs from roughly €200 for a basic trolley unit up to €3,500 for a larger cabinetry unit. These are flat-pack, standardised sizes, and they fit within a standard kitchen rather than being designed for it.
A custom-built bespoke kitchen island, designed and manufactured specifically for your kitchen, typically starts from €2,500 and goes up to €8,000 and above depending on size, materials, and features. An island with a built-in hob, integrated extraction, a sink with plumbing, and a natural stone worktop sits at the upper end of that range. A well-built prep island with a quality worktop, deep cabinetry, and a modest overhang for seating can be done properly for significantly less.
If you’re adding integrated features, budget separately for each. Plumbing for an island sink runs €400 to €1,500 depending on the route and drainage requirements. Electrical work and pop-up sockets add €150 to €600. An induction hob with built-in downdraft extraction sits between €800 and €3,500 depending on the brand. A natural stone worktop in quartzite, marble, or granite typically costs €1,000 to €3,500 for an island, depending on the stone and the size. None of these are surprises if you plan for them. All of them become expensive if you don’t.
What you get when you invest in bespoke: an island dimensioned exactly to your room, cabinetry built to the same standard as the rest of your kitchen, and worktop and finish choices selected for your specific space. The island sits flush, works at the right height throughout, and doesn’t carry the small visual compromises that come with a standard-size product fitted into a room it wasn’t designed for.
At Aloco Kitchens, every island we build comes out of our Santry workshop. The cabinetry is built to spec for your kitchen, not adjusted from a catalogue. That means the island sits flush with your existing cabinetry, the worktop runs at the correct height throughout, and there are no standard-size compromises hidden behind trim strips.
What to Decide Before You Design Your Kitchen Island
Before you start looking at finishes and worktop materials, answer these:
How large is the kitchen? Measure it properly. Note where the doors are, where the windows are, and where the sockets and plumbing currently sit.
Decide on the primary function before anything else. Prep space, seating, or both. The answer changes the size, the overhang depth, and the height of the island entirely.
Plumbing and hob position need to be locked in before any other decisions are made. Both require infrastructure run to the middle of the room. Retrofit is expensive. Plan it first.
Think about how you actually move through the kitchen when you’re cooking. The island should sit within that path, not interrupt it.
What storage do you actually need? Not what looks good. What you genuinely use and where it currently lives.
These questions seem obvious. But the number of island designs that arrive at our workshop without clear answers to them, and then need to be revisited at considerable expense, makes it worth asking them before any design work begins. An island rebuilt because the seating clearance was wrong, or replumbed because the sink position wasn’t planned early, costs significantly more than a thorough conversation at the start.
Ready to Design Your Kitchen Island? Start Here
If you’re researching kitchen island ideas seriously, the most useful next step isn’t another hour of scrolling through images. It’s a conversation with someone who can look at your actual kitchen, understand how you use it, and tell you honestly what will and won’t work in that specific space.
Our design consultations are free and come with no obligation. You can book one at our Santry showroom, where you can see built examples of the cabinetry and worktop materials in person before making any decisions.
The kitchens we build are designed to last twenty to thirty years. The conversation that shapes them takes about an hour.